CREATING BOOKLET - SIMPLE EXAMPLE
Please make sure you have read the One-Click Deployments & Booklet Library sections, before proceeding with this sub-section.
In this section, we will be creating a simple "Display Time" Booklet.
The "Display Time" Booklet, that we will create does something very simple. It outputs a current date and time message when user clicks the booklet's run button.
The goal here is to show how to create and run a booklet. By keeping the code very simple, it makes it easier to understand different pieces involved in creating the booklet.
To create a booklet we need to do following steps :
- 1. Create a "Display Time" RunBook.
- 2. Create a "Display Time" RunBook Instance for the run-book created in step 1.
- 3. Create a "Display Time" Booklet and associate it with the runBook instance created in step 2.
- 4. Run the "Display Time" Booklet.
- 5. Check the "Display Time" Booklet Report and see the output for the above run.
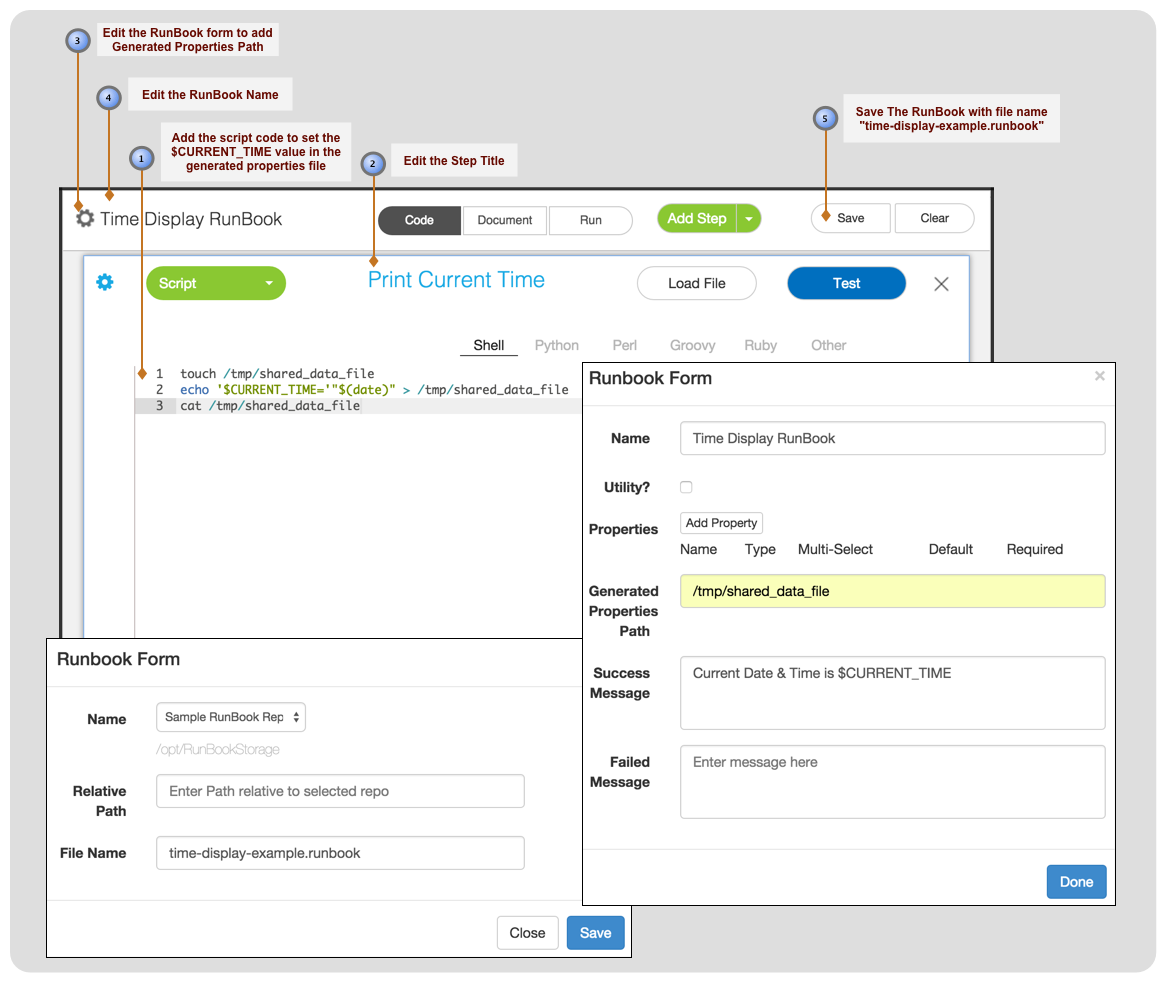
Step 1 : Create a "Display Time" RunBook
Figure below shows screenshot for creating "Display Time" RunBook.
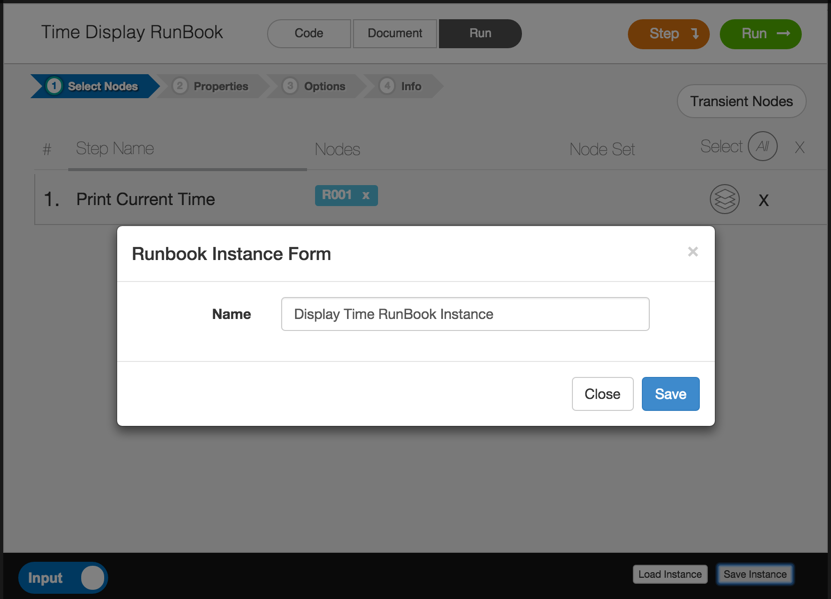
Step 2 : Create a "Display Time" RunBook Instance
Now, that we have created a "Diplay Time" RunBook, let's create a RunBook Instance for it.
RunBook Instance is a combination of RunBook + configuration details (nodes per step, properties, options).
Figure below shows screenshot for creating "Display Time" RunBook Instance.
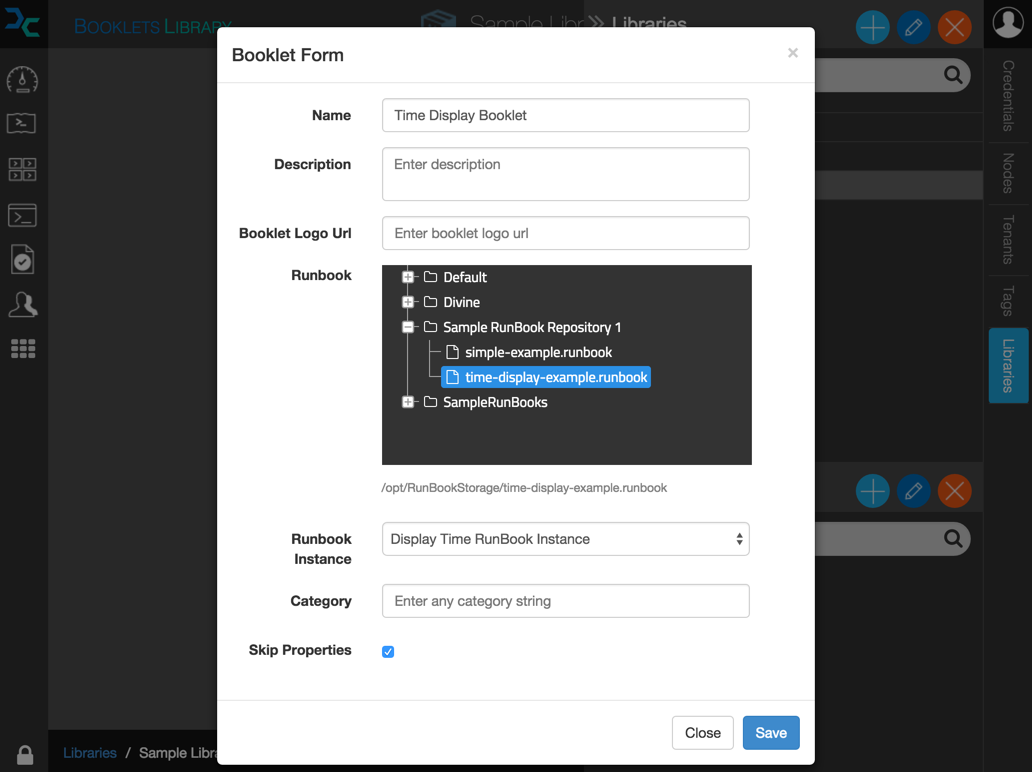
Step 3 : Create a "Display Time" Booklet
Next step is to create "Display Time" Booklet. We will create the booklet in the library we created earlier.
Figure below shows the screen shot of form for creating new booklet.
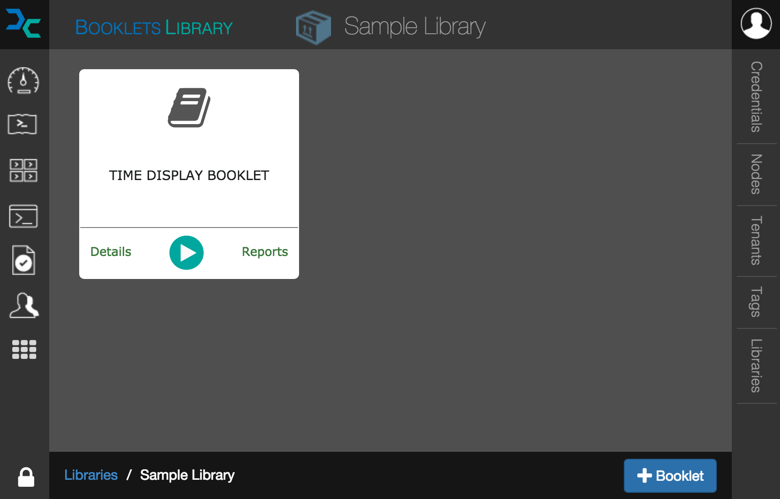
Step 4 : Run the "Display Time" Booklet
After the booklet is created, we can execute it just by clicking the run button on it.
Figure below shows the screen shot of newly created booklet with the Run button.
Step 5 : View the "Display Time" Booklet Execution Report
After the booklet is executed, we can check the results by clicking on the report link.
Figure below shows the screen shot of the "Details" of Booklet execution inside the reports section.
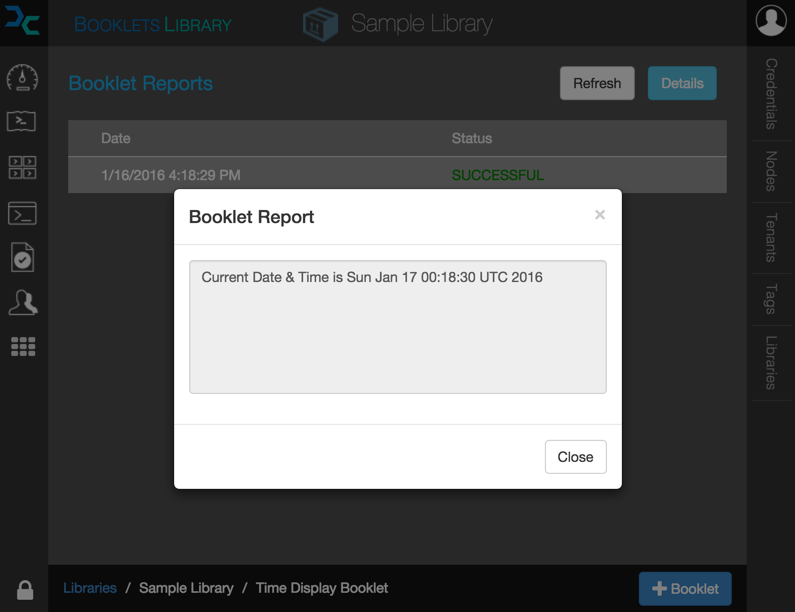
That's it. All user had to do was click the "run" button for the "Display Time" booklet, and he can see the result. Even though this is a very basic example, you can see the power of Booklet. All the complexity is hidden from the user, all they need to know is to click the run button, and the booklet does all the heavy lifting. Later we will look into more real-world example of using booklets.
True power of booklet lies in hiding all the complexity from the users of booklet and presenting them a simple interface i.e.
to click "Run" button, and behind the scenes doing all the magic required.
Example : DevOps can create a booklet, where users just hit the "Run"
button and behind the scene complete product infrastructure setup is done, including provisioning the servers and deploying application on top of it.
From user perspective all they had to do is click the "Run" button and in the single click they get a complete infrastructure setup for them to use.